关于Android网络请求封装的疑问与挑战

,在Android中,网络请求封装通常使用第三方库如Retrofit或OkHttp。这些库提供了简洁的API来发送HTTP请求并处理响应,同时支持异步操作和JSON解析等功能。,“
Android网络请求封装
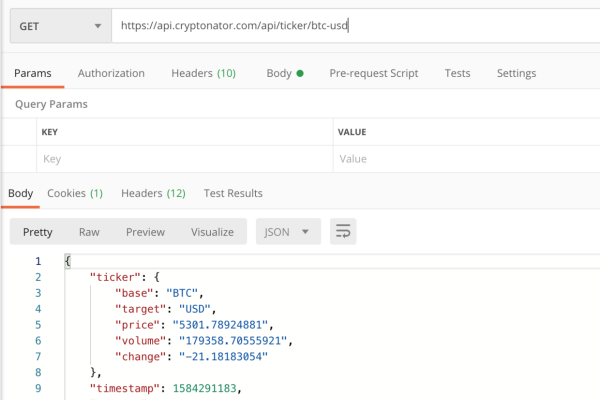
在Android开发中,网络请求是应用与服务器之间数据交互的重要方式,为了提高代码的可维护性和复用性,通常会对网络请求进行封装,以下是关于Android网络请求封装的详细内容:
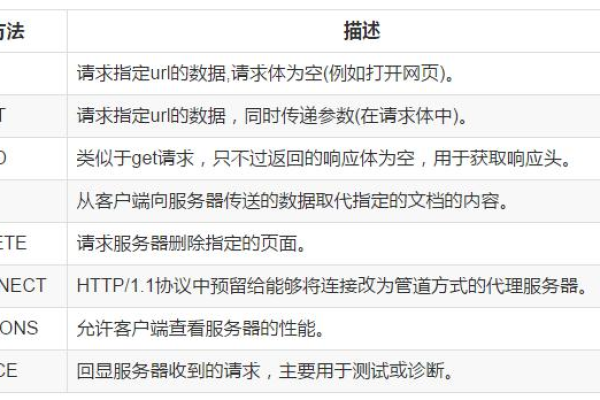
一、使用HttpURLConnection封装
1、配置网络权限和安全文件:
在AndroidManifest.xml文件中添加网络权限:
     <uses-permission android:name="android.permission.ACCESS_NETWORK_STATE" />
     <uses-permission android:name="android.permission.INTERNET" />
在res/xml目录下创建network_security_config.xml文件,并添加以下内容以允许明文流量(仅用于调试):
     <?xml version="1.0" encoding="utf-8"?>
     <network-security-config>
         <base-config cleartextTrafficPermitted="true" />
     </network-security-config>
在AndroidManifest.xml中的<application>标签下添加:

android:networkSecurityConfig="@xml/network_security_config"
2、创建MyRequest类封装请求方法:
在Java目录下的包名文件夹下创建一个名为MyRequest的类,并编写POST和GET请求的方法:
     import java.io.ByteArrayOutputStream;
     import java.io.DataOutputStream;
     import java.io.InputStream;
     import java.net.HttpURLConnection;
     import java.net.URL;
     public class MyRequest {
        public String post(String url1, String data) {
            try {
                URL url = new URL(url1);
                HttpURLConnection connection = (HttpURLConnection) url.openConnection();
                connection.setRequestMethod("POST");
                connection.setConnectTimeout(3000);
                connection.setReadTimeout(3000);
                connection.setDoInput(true);
                connection.setDoOutput(true);
                connection.setUseCaches(false);
                connection.connect();
                DataOutputStream dos = new DataOutputStream(connection.getOutputStream());
                String title = data;
                dos.write(title.getBytes());
                dos.flush();
                dos.close();
                int responseCode = connection.getResponseCode();
                if (responseCode == HttpURLConnection.HTTP_OK) {
                    InputStream inputStream = connection.getInputStream();
                    ByteArrayOutputStream arrayOutputStream = new ByteArrayOutputStream();
                    byte[] bytes = new byte[1024];
                    int length = 0;
                    while ((length = inputStream.read(bytes)) != -1) {
                        arrayOutputStream.write(bytes, 0, length);
                        arrayOutputStream.flush();
                    }
                    String s = arrayOutputStream.toString();
                    return s;
                } else {
                    return "-1";
                }
            } catch (Exception e) {
                return "-1";
            }
         }
        public String get(String url1) {
            try {
                URL url = new URL(url1);
                HttpURLConnection connection = (HttpURLConnection) url.openConnection();
                connection.setRequestMethod("GET");
                connection.setConnectTimeout(3000);
                connection.setReadTimeout(3000);
                int responseCode = connection.getResponseCode();
                if (responseCode == HttpURLConnection.HTTP_OK) {
                    InputStream inputStream = connection.getInputStream();
                    ByteArrayOutputStream arrayOutputStream = new ByteArrayOutputStream();
                    byte[] bytes = new byte[1024];
                    int length = 0;
                    while ((length = inputStream.read(bytes)) != -1) {
                        arrayOutputStream.write(bytes, 0, length);
                        arrayOutputStream.flush();
                    }
                    String s = arrayOutputStream.toString();
                    return s;
                } else {
                    return "-1";
                }
            } catch (Exception e) {
                return "-1";
            }
         }
     }
使用示例:
     MyRequest myRequest = new MyRequest();
     String result = myRequest.post("http://example.com/api", "id=1&data=2");
     Log.d("Result", result);
二、使用OkHttp封装
1、添加依赖:在build.gradle文件中添加OkHttp的依赖:
implementation 'com.squareup.okhttp3:okhttp:4.9.0'
2、创建OkHttpClientUtil工具类:

   import okhttp3.Interceptor;
   import okhttp3.OkHttpClient;
   import okhttp3.logging.HttpLoggingInterceptor;
   import java.util.concurrent.TimeUnit;
   public class OkHttpClientUtil {
       private static final int TIME_OUT = 20;
       private static OkHttpClient mOkHttpClient;
       static {
           HttpLoggingInterceptor loggingInterceptor = new HttpLoggingInterceptor();
           loggingInterceptor.setLevel(HttpLoggingInterceptor.Level.BODY);
           OkHttpClient.Builder builder = new OkHttpClient.Builder()
               .connectTimeout(TIME_OUT, TimeUnit.SECONDS)
               .readTimeout(TIME_OUT, TimeUnit.SECONDS)
               .writeTimeout(TIME_OUT, TimeUnit.SECONDS)
               .addInterceptor(loggingInterceptor);
           mOkHttpClient = builder.build();
       }
       public static OkHttpClient getInstance() {
           return mOkHttpClient;
       }
   }
3、创建RetrofitUtils工具类:
   import okhttp3.OkHttpClient;
   import retrofit2.Retrofit;
   import retrofit2.converter.gson.GsonConverterFactory;
   public class RetrofitUtils {
       private static final String BASE_URL = "https://api.example.com/";
       private static Retrofit mRetrofit;
       static {
           OkHttpClient okHttpClient = OkHttpClientUtil.getInstance();
           mRetrofit = new Retrofit.Builder()
               .baseUrl(BASE_URL)
               .client(okHttpClient)
               .addConverterFactory(GsonConverterFactory.create())
               .build();
       }
       public static Retrofit getInstance() {
           return mRetrofit;
       }
   }
4、定义API接口:使用注解定义接口方法,对应不同的请求类型和参数,定义一个获取用户信息的接口:
   import retrofit2.Call;
   import retrofit2.http.GET;
   import retrofit2.http.Path;
   public interface UserService {
       @GET("users/{userId}")
           Call<User> getUserById(@Path("userId") int userId);
   }
User是一个自定义的Java类,用于映射JSON数据。
5、在活动中使用:在需要发起网络请求的Activity或Fragment中,通过Retrofit实例获取接口对象,并调用接口方法发起请求:
   UserService userService = RetrofitUtils.getInstance().create(UserService.class);
   Call<User> call = userService.getUserById(1);
   call.enqueue(new retrofit2.Callback<User>() {
       @Override
           public void onResponse(Call<User> call, Response<User> response) {
               if (response.isSuccessful()) {
                   User user = response.body();
                   // 处理成功响应的数据
               } else {
                   // 处理失败响应
               }
           }
       @Override
           public void onFailure(Call<User> call, Throwable t) {
               // 处理请求失败的情况
           }
   });
相关问题与解答
1、问题:为什么需要在AndroidManifest.xml中添加网络权限?

回答:在AndroidManifest.xml中添加网络权限是为了允许应用访问网络,没有这些权限,应用将无法进行任何形式的网络通信,包括发送HTTP请求、接收响应等,这是出于安全考虑,确保应用不会在未经用户许可的情况下访问网络资源。
2、问题:使用OkHttp相比HttpURLConnection有什么优势?
回答:OkHttp相比HttpURLConnection具有以下优势:性能更好,支持连接池和HTTP/2协议;使用更简单,提供了更简洁的API;功能更丰富,如自动重试、缓存控制等,OkHttp还支持同步和异步请求,并且可以方便地与Retrofit等库结合使用,进一步简化网络请求的开发工作。


热门文章
-

云服务器在搭建实时报警平台中扮演什么角色?
2024-10-04 -

MySQL存储过程的高效使用与编写指南,如何优化C语言中的MySQL存储过程?
2025-03-08 -

为什么服务器在技术世界中如此受到青睐?
2024-10-08 -

微信中拉黑某人后,其头像显示状态会有什么变化?
2024-11-12 -
配件网站模板_网站模板设置
2024-06-23 -

QQ资料卡为何显示为空?原因何在?
2024-11-11 -

如何检查网络连接状态以确保设备已连接到互联网?
2025-03-01 -

如何轻松租用云服务器,关键步骤和技巧指南
2024-09-22