如何实现一个浮动的购物车功能使用JavaScript?
- 行业动态
- 2024-11-12
- 6
浮动购物车 JavaScript 实现
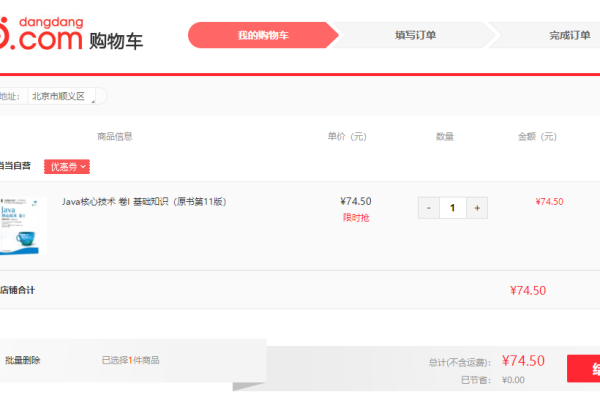
在现代电子商务网站中,浮动购物车是一个常见的功能,它允许用户在浏览商品时,实时查看和管理他们添加到购物车中的商品,本文将介绍如何使用 JavaScript 和 HTML 创建一个基本的浮动购物车。
目录
1、[HTML 结构](#html-结构)
2、[CSS 样式](#css-样式)
3、[JavaScript 逻辑](#javascript-逻辑)
4、[(#
HTML 结构
我们需要一个基本的 HTML 结构来包含我们的购物车和商品列表,以下是一个简单的示例:
<!DOCTYPE html>
<html lang="en">
<head>
    <meta charset="UTF-8">
    <meta name="viewport" content="width=device-width, initial-scale=1.0">
    <title>浮动购物车</title>
    <link rel="stylesheet" href="styles.css">
</head>
<body>
    <div class="cart-container">
        <div class="cart">
            <h2>购物车</h2>
            <ul class="cart-items"></ul>
            <p id="total-price">总价: $0.00</p>
        </div>
    </div>

    <div class="product-list">
        <div class="product" data-price="10.00" data-name="产品 A">
            <h3>产品 A</h3>
            <button class="add-to-cart">添加到购物车</button>
        </div>
        <div class="product" data-price="20.00" data-name="产品 B">
            <h3>产品 B</h3>
            <button class="add-to-cart">添加到购物车</button>
        </div>
        <!-更多商品 -->
    </div>
    <script src="script.js"></script>
</body>
</html>
在这个 HTML 结构中,我们有一个cart 容器用于显示购物车的内容,以及一个product-list 容器用于展示商品列表,每个商品都有一个按钮,当点击该按钮时,会将商品添加到购物车中。
CSS 样式
我们为页面添加一些基本的样式,使其更加美观,以下是一个简单的 CSS 样式表:
/* styles.css */
body {
    font-family: Arial, sans-serif;
}
.cart-container {
    position: fixed;
    top: 50px;
    right: 20px;
    width: 300px;
    background-color: #f9f9f9;
    border: 1px solid #ccc;
    box-shadow: 0 0 10px rgba(0, 0, 0, 0.1);
    padding: 20px;
}
.cart h2 {
    margin-top: 0;
}
.cart .cart-items {
    list-style: none;
    padding: 0;
}
.cart .cart-items li {
    padding: 10px;
    border-bottom: 1px solid #ccc;
}
.cart .cart-items li:last-child {
    border-bottom: none;
}
.product-list {
    display: flex;
    flex-wrap: wrap;
    gap: 20px;
    padding: 20px;
}
.product {
    background-color: #fff;
    border: 1px solid #ccc;
    border-radius: 5px;
    padding: 20px;
    width: calc(33.333% 40px);
    box-shadow: 0 0 10px rgba(0, 0, 0, 0.1);
}
.add-to-cart {
    background-color: #007bff;
    color: white;
    border: none;
    padding: 10px 20px;
    cursor: pointer;
    border-radius: 5px;
}
这些样式将使购物车固定在页面的右上角,并使商品列表以网格布局显示,每个商品都有一个按钮,当点击该按钮时,会将商品添加到购物车中。
JavaScript 逻辑
我们编写 JavaScript 来实现浮动购物车的功能,以下是一个简单的脚本:
// script.js
document.addEventListener('DOMContentLoaded', () => {
    const cart = document.querySelector('.cart');
    const cartItems = document.querySelector('.cart-items');
    const totalPriceElement = document.getElementById('total-price');
    const addToCartButtons = document.querySelectorAll('.add-to-cart');
    let cartContent = [];
    let totalPrice = 0.00;
    addToCartButtons.forEach(button => {
        button.addEventListener('click', () => {
            const product = button.closest('.product');
            const productName = product.getAttribute('data-name');
            const productPrice = parseFloat(product.getAttribute('data-price'));
            // 检查商品是否已经在购物车中
            const existingProductIndex = cartContent.findIndex(item => item.name === productName);
            if (existingProductIndex !== -1) {
                // 如果商品已经在购物车中,增加数量
                cartContent[existingProductIndex].quantity += 1;
            } else {
                // 如果商品不在购物车中,添加新商品
                cartContent.push({ name: productName, price: productPrice, quantity: 1 });
            }
            // 更新购物车显示
            updateCartDisplay();
        });
    });
    function updateCartDisplay() {
        // 清空现有的购物车内容
        cartItems.innerHTML = '';
        totalPrice = 0.00;
        // 重新计算总价并更新购物车显示
        cartContent.forEach(item => {
            const li = document.createElement('li');
            li.textContent =${item.name} x ${item.quantity} @ $${item.price.toFixed(2)};
            cartItems.appendChild(li);
            totalPrice += item.price * item.quantity;
        });
        totalPriceElement.textContent =总价: $${totalPrice.toFixed(2)};
    }
});在这个脚本中,我们首先选择购物车和商品列表的元素,然后监听每个添加到购物车的按钮的点击事件,当按钮被点击时,我们将相应的商品添加到购物车中,并更新购物车的显示,如果商品已经在购物车中,则增加其数量;否则,添加新的商品项,我们通过updateCartDisplay 函数更新购物车的显示内容和总价。
通过以上步骤,我们已经创建了一个基本的浮动购物车功能,这个功能包括商品的添加、数量的增加以及总价的计算,这只是一个非常简单的实现,实际应用中可能还需要处理更多的细节,例如商品的删除、数量的减少、优惠活动的处理等,希望这篇文章对你有所帮助!
以上就是关于“浮动购物车js”的问题,朋友们可以点击主页了解更多内容,希望可以够帮助大家!
