如何以安全模式进行网络连接?
- 行业动态
- 2025-03-04
- 5
在安全模式下进行网络连接,通常是为了解决一些网络问题或进行特定的网络诊断,以下是详细的步骤和说明:
一、Windows系统
进入安全模式
对于Windows 10/8:
打开“设置”应用,选择“更新和安全”。
在左侧菜单中点击“恢复”,然后在右侧找到“高级启动”部分,点击“立即重新启动”。
计算机重启后会进入高级启动选项菜单,选择“疑难解答” > “高级选项” > “启动设置”,然后点击“重启”。
计算机再次重启后,会出现一个列表供你选择,按数字键选择“启用安全模式”或“启用带网络的安全模式”。
对于Windows 7:
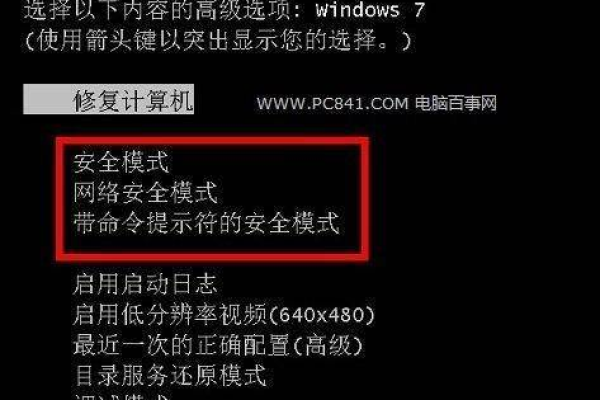
在开机时按住F8键(某些系统可能需要按住Shift+F8),直到出现高级启动选项菜单。
使用箭头键选择“带网络连接的安全模式”,然后按Enter键。

网络连接
一旦进入带网络的安全模式,Windows会自动尝试连接到上次成功连接的网络,如果需要手动配置网络:
点击任务栏右下角的网络图标,选择要连接的网络,输入密码即可。
如果需要更复杂的网络设置,如静态IP地址,可以打开“控制面板” > “网络和共享中心” > “更改适配器设置”,右键点击相应的网络适配器,选择“属性”,然后进行设置。
二、Mac系统
进入安全模式
关机状态下,长按Shift键,然后按下电源键开机,直到看到登录窗口再松开Shift键。
或者,在开机过程中长按Command + R键,进入恢复模式,然后选择“实用工具” > “终端”,输入/sbin/fsck -fy并回车,完成后再次输入/sbin/mount -uw /并回车,最后输入reboot重启进入安全模式。
网络连接
Mac在安全模式下通常会自动连接可用的网络,如果需要手动配置:
点击屏幕右上角的Wi-Fi图标,选择网络并输入密码。
如需进一步设置,如代理服务器等,可以打开“系统偏好设置” > “网络”,选择相应的网络服务进行详细配置。
三、Linux系统(以Ubuntu为例)
进入安全模式
在GRUB引导菜单出现时,按任意键进入编辑模式。
找到以“linux”开头的行,将“ro quiet splash”改为“rw init=/bin/bash”,然后按Ctrl+X或F10启动。
网络连接
进入命令行界面后,可以使用以下命令查看网络接口:ip link show。
使用dhclient命令为指定接口获取IP地址,dhclient eth0(假设eth0是你的网络接口)。

如果需要配置静态IP,可以编辑/etc/network/interfaces文件,添加类似以下内容:
 auto eth0
  iface eth0 inet static
      address 192.168.1.100
      netmask 255.255.255.0
gateway 192.168.1.1 保存并退出后,执行ifdown eth0 && ifup eth0来应用设置。
相关问答FAQs
Q1: 如果我在安全模式下无法连接到网络,该怎么办?
A1: 首先检查网络硬件是否正常工作,比如路由器、网线等,确保网络驱动程序已正确加载,在Windows中,可以尝试通过设备管理器更新或重新安装网络驱动,如果是无线连接,确认无线网卡已开启且处于可连接状态,检查是否有防火墙或安全软件阻止了网络连接。
Q2: 在安全模式下可以进行哪些网络相关的操作?
A2: 在安全模式下,你可以进行基本的网络测试,如Ping测试以检查网络连通性,还可以访问命令行或终端,使用网络工具(如Traceroute、Telnet等)进行故障排查,你可以下载并安装必要的驱动程序或软件更新来解决导致正常模式下网络问题的故障,不过需要注意的是,由于安全模式主要是为了诊断和修复问题,某些高级功能可能受到限制。
