上一篇
Cropbox.js,如何轻松实现图片裁剪功能?
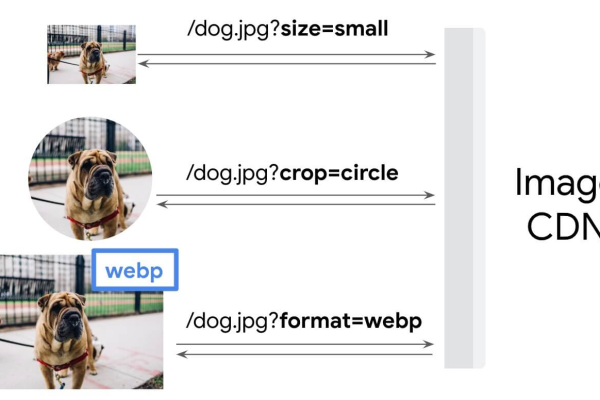
cropbox.js 是一个轻量级且简单的 JavaScript、jQuery 和 YUI 插件,用于裁剪图像,特别是头像。它提供了用户友好的界面,支持图片的在线剪裁、放大缩小以及生成不同尺寸的缩略图等功能。
CropBox.js 文档
CropBox.js 是一个轻量级的 JavaScript 库,用于在网页上实现图片裁剪功能,它提供了简单易用的 API,使得开发者可以快速集成图片裁剪功能到他们的项目中,无论是桌面端还是移动端,CropBox.js 都能提供良好的用户体验。

安装
要使用 CropBox.js,首先需要将其引入到你的项目中,你可以通过以下几种方式来安装:
1、通过 npm 安装:
npm install cropbox
2、通过 CDN 引入:
<script src="https://cdn.jsdelivr.net/npm/cropbox@latest/dist/cropbox.min.js"></script>
3、下载源码:
从 [GitHub](https://github.com/acorn-zumeku/cropbox) 页面下载最新的源码包,并在你的项目中引用。
基本用法
以下是一个简单的示例,展示如何使用 CropBox.js 来实现图片裁剪功能。
HTML
<!DOCTYPE html>
<html lang="en">
<head>
    <meta charset="UTF-8">
    <title>CropBox.js Example</title>
    <link rel="stylesheet" href="https://cdn.jsdelivr.net/npm/cropbox@latest/dist/cropbox.css">
    <style>
        img {
            max-width: 100%;
            height: auto;
        }
    </style>
</head>
<body>
    <input type="file" id="upload" />
    <img id="image" src="path/to/your/image.jpg"  />
    <button id="crop">Crop</button>
    <canvas id="canvas"></canvas>
    <script src="https://cdn.jsdelivr.net/npm/cropbox@latest/dist/cropbox.min.js"></script>
    <script>
        document.getElementById('upload').addEventListener('change', function(event) {
            const reader = new FileReader();
            reader.onload = function() {
                const img = document.getElementById('image');
                img.src = reader.result;
                img.style.display = 'block';
            };
            reader.readAsDataURL(event.target.files[0]);
        });
        document.getElementById('crop').addEventListener('click', function() {
            const img = document.getElementById('image');
            const options = {
                imgTag: img,
                width: 400,
                height: 400
            };
            const cropper = new CropBox(options);
            document.getElementById('canvas').width = cropper.getData()[0];
            document.getElementById('canvas').height = cropper.getData()[1];
            const ctx = document.getElementById('canvas').getContext('2d');
            const imgElem = new Image();
            imgElem.src = cropper.getData()[2];
            imgElem.onload = function() {
                ctx.clearRect(0, 0, ctx.canvas.width, ctx.canvas.height);
                ctx.drawImage(imgElem, 0, 0, ctx.canvas.width, ctx.canvas.height);
            };
        });
    </script>
</body>
</html>
说明
1、HTML 部分:包含一个文件上传控件、一个用于显示图片的<img> 标签、一个裁剪按钮和一个用于显示裁剪结果的<canvas> 元素。
2、JavaScript 部分:监听文件上传事件,读取并显示图片;点击裁剪按钮后,使用 CropBox.js 进行图片裁剪,并将裁剪结果显示在画布上。
配置选项
CropBox.js 提供了丰富的配置选项,以满足不同的需求,以下是一些常用的配置选项:
| 选项 | 类型 | 默认值 | 描述 |
| imgTag | Element | null | 要裁剪的图片元素 |
| width | Number | null | 裁剪区域的宽度 |
| height | Number | null | 裁剪区域的高度 |
| keepAspectRatio | Boolean | true | 是否保持宽高比 |
| modal | Boolean | false | 是否以模态框形式显示 |
| dragMode | String | ‘move’ | 拖动模式,可选 ‘move’, ‘crop’, ‘move-and-crop’ |
| autoCropArea | Boolean | false | 是否自动调整裁剪区域 |
| minWidth | Number | 0 | 最小宽度 |
| minHeight | Number | 0 | 最小高度 |
| maxWidth | Number | Infinity | 最大宽度 |
| maxHeight | Number | Infinity | 最大高度 |
方法
CropBox.js 提供了一些方法,用于控制裁剪操作:
generate(options):生成裁剪数据,返回一个包含裁剪区域坐标和尺寸的数组。
getData()[n]:获取裁剪数据,返回一个包含四个元素的数组,分别是裁剪区域的 x, y, 宽度和高度。
getImageData():获取裁剪后的图像数据,返回一个包含图像数据的数组。
getCanvasData():获取裁剪后的画布数据,返回一个包含画布数据的数组。
getCroppedImage():获取裁剪后的图像对象,返回一个包含图像对象的数组。
getCroppedCanvas():获取裁剪后的画布对象,返回一个包含画布对象的数组。
moveTo(x, y):移动裁剪区域到指定位置,接受两个参数,分别是 x 和 y 坐标。
resizeTo(width, height):调整裁剪区域的尺寸,接受两个参数,分别是宽度和高度。
destroy():销毁裁剪实例,释放资源并移除相关事件监听器。
示例代码
以下是一个完整的示例代码,展示了如何使用 CropBox.js 进行图片裁剪,并将裁剪结果显示在页面上。
<!DOCTYPE html>
<html lang="en">
<head>
    <meta charset="UTF-8">
    <title>CropBox.js Example</title>
    <link rel="stylesheet" href="https://cdn.jsdelivr.net/npm/cropbox@latest/dist/cropbox.css">
    <style>
        img {
            max-width: 100%;
            height: auto;
        }
    </style>
</head>
<body>
    <input type="file" id="upload" />
    <img id="image" src="path/to/your/image.jpg"  />
    <button id="crop">Crop</button>
    <canvas id="canvas"></canvas>
    <script src="https://cdn.jsdelivr.net/npm/cropbox@latest/dist/cropbox.min.js"></script>
    <script>
        document.getElementById('upload').addEventListener('change', function(event) {
            const reader = new FileReader();
            reader.onload = function() {
                const img = document.getElementById('image');
                img.src = reader.result;
                img.style.display = 'block';
            };
            reader.readAsDataURL(event.target.files[0]);
        });
        document.getElementById('crop').addEventListener('click', function() {
            const img = document.getElementById('image');
            const options = {
                imgTag: img,
                width: 400,
                height: 400,
                keepAspectRatio: true,
                modal: false,
                dragMode: 'move',
                autoCropArea: false,
                minWidth: 0,
                minHeight: 0,
                maxWidth: Infinity,
                maxHeight: Infinity,
            };
            const cropper = new CropBox(options);
            document.getElementById('canvas').width = cropper.getData()[0];
            document.getElementById('canvas').height = cropper.getData()[1];
            const ctx = document.getElementById('canvas').getContext('2d');
            const imgElem = new Image();
            imgElem.src = cropper.getData()[2];
            imgElem.onload = function() {
                ctx.clearRect(0, 0, ctx.canvas.width, ctx.canvas.height);
                ctx.drawImage(imgElem, 0, 0, ctx.canvas.width, ctx.canvas.height);
            };
        });
    </script>
</body>
</html>
FAQs
1、如何设置初始裁剪区域?
可以通过设置initialPosition 和initialSize 选项来定义初始裁剪区域的位置和大小。
   const options = {
       imgTag: img,
       width: 400,
       height: 400,
       initialPosition: 'center', // 可选值:'top-left', 'top-right', 'bottom-left', 'bottom-right', 'center'
       initialSize: 'cover'        // 可选值:'contain', 'cover'
};2、如何自定义裁剪区域的样式?
可以通过 CSS 自定义裁剪区域的样式。
   .cropbox-overlay {
       background-color: rgba(0, 0, 0, 0.5); /* 半透明背景 */
   }
   .cropbox-crop-area {
       border: 2px dashed #fff; /* 白色虚线边框 */
}3、如何限制裁剪区域的最小和最大尺寸?
可以通过设置minWidth,minHeight,maxWidth,maxHeight 选项来限制裁剪区域的尺寸范围。
   const options = {
       imgTag: img,
       width: 400,
       height: 400,
       minWidth: 100,
       minHeight: 100,
       maxWidth: 800,
       maxHeight: 600,
};4、如何在移动设备上使用 CropBox.js?
CropBox.js 支持触摸事件,可以在移动设备上正常使用,确保在移动设备的浏览器中启用了 JavaScript。
5、如何获取裁剪后的图像数据?
可以使用getImageData() 方法获取裁剪后的图像数据。
   const imageData = cropper.getImageData();
   // imageData 是一个包含图像数据的数组,可以根据需要进行处理,如保存到服务器或显示在页面上。
6、如何将裁剪后的图像保存到服务器?
可以使用 AJAX 请求将裁剪后的图像数据发送到服务器进行保存。
   const formData = new FormData();
   formData.append('image', new Blob([cropper.getImageData()]), { type: 'image/png' });
fetch('/upload', { method: 'POST', body: formData }) .then(response => response.json()) .then(data => { console.log('Image uploaded successfully:', data); }); 本站发布或转载的文章及图片均来自网络,其原创性以及文中表达的观点和判断不代表本站,有问题联系侵删!
本文链接:http://www.xixizhuji.com/fuzhu/399738.html