探索Skimage,这个库在图像处理中有哪些独特应用与优势?
- 行业动态
- 2024-12-29
- 4679
skimage 是一个用于图像处理的 Python 库,它提供了许多函数和工具,可以帮助用户进行图像分析、处理和操作。
深入探索skimage:强大的图像处理库
scikit-image,简称skimage,是一个基于Python的图像处理库,它建立在NumPy和SciPy生态系统之上,提供了丰富的图像处理功能,包括图像的预处理、特征提取、分析和增强等,凭借其简洁的API和强大的功能,skimage已成为计算机视觉和图像处理领域的重要工具之一,无论是学术研究还是工业应用都十分广泛,本文将详细介绍skimage的特点、安装方法以及核心功能的解析,并通过实战案例展示如何使用skimage构建一个简单的图像边缘检测工具。
一、skimage的特点与优势
1、功能丰富:skimage提供多种常用的图像处理算法,如边缘检测、滤波、阈值分割、形态学操作等。
2、简单易用:通过Pythonic的设计,skimage可以让开发者快速实现复杂的图像处理任务。
3、强大的生态系统:与NumPy、SciPy、Matplotlib和scikit-learn等工具无缝集成,可以轻松扩展到更广泛的数据处理和机器学习任务。
4、跨领域支持:不仅适用于计算机视觉,还广泛应用于医学影像分析、遥感影像处理、生物信息学等领域。
二、安装skimage
可以通过pip或conda进行安装:
pip install scikit-image
或者
conda install -c conda-forge scikit-image
三、基本用法
以下是skimage的基本使用示例,包括加载图像、显示图像和简单的处理操作。
import numpy as np
from skimage import io, color, filters
import matplotlib.pyplot as plt
加载图像
image = io.imread('example.jpg')  # 支持多种格式,如 JPG、PNG、TIFF
grayscale_image = color.rgb2gray(image)  # 转为灰度图
应用滤波器
edges = filters.sobel(grayscale_image)
显示图像
plt.figure(figsize=(10, 5))
plt.subplot(1, 3, 1)
plt.title('Original Image')
plt.imshow(image)
plt.axis('off')
plt.subplot(1, 3, 2)
plt.title('Grayscale Image')
plt.imshow(grayscale_image, cmap='gray')
plt.axis('off')
plt.subplot(1, 3, 3)
plt.title('Edge Detection (Sobel)')
plt.imshow(edges, cmap='gray')
plt.axis('off')
plt.tight_layout()
plt.show()
四、核心功能解析
1. 图像加载与保存
skimage.io模块支持从文件、URL或numpy数组中加载图像。
from skimage import io
加载和显示图像
image = io.imread('example.jpg')
io.imshow(image)
io.show()
保存图像
io.imsave('output.jpg', image)
2. 图像变换
使用skimage.transform模块可以轻松完成图像的旋转、缩放和裁剪等操作。
from skimage import transform
旋转图像
rotated = transform.rotate(image, angle=45)
缩放图像
resized = transform.resize(image, (100, 100))
显示结果
plt.subplot(1, 2, 1)
plt.title('Rotated')
plt.imshow(rotated)
plt.axis('off')
plt.subplot(1, 2, 2)
plt.title('Resized')
plt.imshow(resized)
plt.axis('off')
plt.show()
3. 图像分割
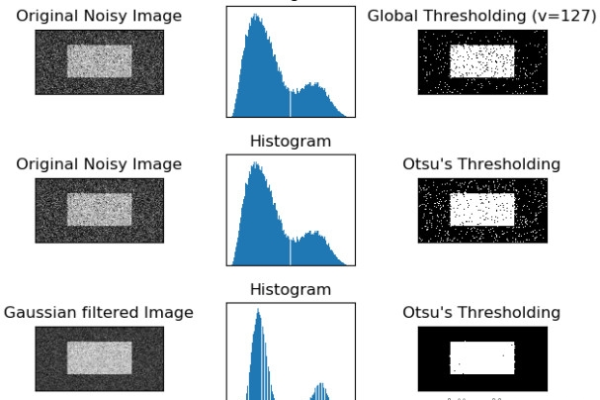
图像分割是计算机视觉中的核心任务,skimage提供了多种分割算法,例如阈值分割、区域分割和聚类分割。
from skimage import filters
使用 Otsu 阈值法分割
threshold = filters.threshold_otsu(grayscale_image)
binary_image = grayscale_image > threshold
plt.subplot(1, 2, 1)
plt.title('Grayscale Image')
plt.imshow(grayscale_image, cmap='gray')
plt.axis('off')
plt.subplot(1, 2, 2)
plt.title('Binary Image')
plt.imshow(binary_image, cmap='gray')
plt.axis('off')
plt.show()
4. 特征提取
skimage.feature模块支持特征提取,例如边缘检测、角点检测和HOG特征。
from skimage.feature import canny
使用 Canny 边缘检测
edges = canny(grayscale_image, sigma=1)
plt.title('Edge Detection (Canny)')
plt.imshow(edges, cmap='gray')
plt.axis('off')
plt.show()
5. 形态学操作
skimage.morphology提供了多种形态学操作工具,如膨胀、腐蚀和骨架化。
from skimage.morphology import dilation, square
图像膨胀
dilated = dilation(binary_image, square(3))
plt.subplot(1, 2, 1)
plt.title('Binary Image')
plt.imshow(binary_image, cmap='gray')
plt.axis('off')
plt.subplot(1, 2, 2)
plt.title('Dilated Image')
plt.imshow(dilated, cmap='gray')
plt.axis('off')
plt.show()
五、实战:构建一个简单的图像边缘检测工具
我们将利用skimage构建一个简单的工具,允许用户上传图像,并应用边缘检测算法,项目结构如下:
image-edge-detection/
├── app.py          # 主应用逻辑
└── index.html      # HTML 页面
app.py代码示例:
from flask import Flask, request, render_template, send_file
from skimage import io, filters, color
import numpy as np
import os
from PIL import Image as PILImage
from io import BytesIO
app = Flask(__name__)
UPLOAD_FOLDER = 'uploads'
if not os.path.exists(UPLOAD_FOLDER):
    os.makedirs(UPLOAD_FOLDER)
@app.route('/', methods=['GET', 'POST'])
def upload_predict():
    target = os.path.join(UPLOAD_FOLDER, 'image.jpg')
    if request.method == 'POST':
        file = request.files['image']
        if file:
            filename = file.filename
            filepath = os.path.join(UPLOAD_FOLDER, filename)
            file.save(filepath)
            img = io.imread(filepath)
            grayscale = color.rgb2gray(img)
            edges = filters.sobel(grayscale)
            io.imsave('static/edges.jpg', edges)
            return render_template('index.html', original=True, edges=True)
    elif request.method == 'GET':
        return render_template('index.html', original=False, edges=False)
    return render_template('index.html')
@app.route('/uploads/<filename>')
def uploaded_file(filename):
    return send_file(os.path.join(UPLOAD_FOLDER, filename))
@app.route('/display/edges.jpg')
def display_edges():
    return send_file('static/edges.jpg')
if __name__ == '__main__':
    app.run(debug=True)
index.html代码示例:
<!DOCTYPE html>
<html lang="en">
<head>
    <meta charset="UTF-8">
    <meta name="viewport" content="width=device-width, initial-scale=1.0">
    <title>Image Edge Detection</title>
</head>
<body>
    <h1>Image Edge Detection</h1>
    <form action="/" method="post" enctype="multipart/form-data">
        <input type="file" name="image" accept="image/*">
        <input type="submit" value="Upload and Process">
    </form>
    {% if original %}
        <h2>Original Image</h2>
        <img src="{{ url_for('uploaded_file', filename='image.jpg') }}" alt="Original Image">
    {% endif %}
    {% if edges %}
        <h2>Edge Detected Image</h2>
        <img src="{{ url_for('display_edges') }}" alt="Edge Detected Image">
    {% endif %}
</body>
</html> 本站发布或转载的文章及图片均来自网络,其原创性以及文中表达的观点和判断不代表本站,有问题联系侵删!
本文链接:https://www.xixizhuji.com/fuzhu/377239.html

