如何在CentOS上配置Apache以支持多网站?
- 行业动态
- 2024-12-07
- 3122
CentOS 上配置 Apache,实现多网站托管,需编辑 httpd.conf 文件或使用虚拟主机。
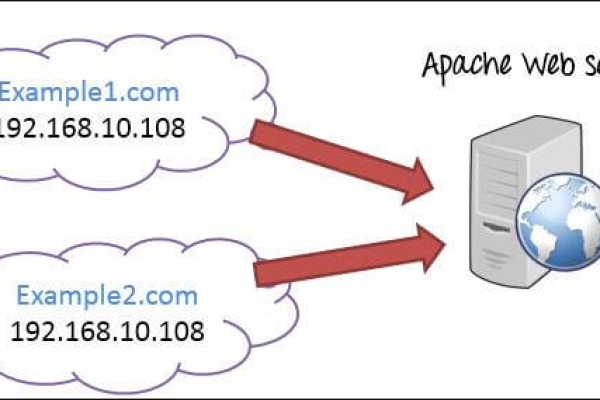
在CentOS操作系统上安装并配置Apache以托管多个网站,是一个常见的任务,本文将详细介绍如何在CentOS上完成这一过程,包括安装Apache、配置虚拟主机、启动服务以及测试访问等步骤,通过以下步骤,你可以轻松地在同一台服务器上托管多个网站。
一、安装Apache
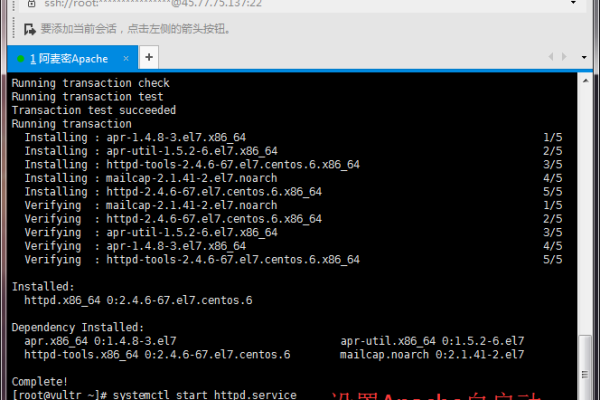
需要确保系统软件包是最新的,然后安装Apache HTTP Server及其依赖的软件包,以下是详细步骤:
1、更新系统软件包:
sudo yum update -y
2、安装Apache:
sudo yum install httpd -y
3、启动Apache服务:
sudo systemctl start httpd
4、设置Apache开机自启动:
sudo systemctl enable httpd
5、检查Apache状态:
sudo systemctl status httpd
二、配置防火墙
为了允许外部用户访问你的Web服务器,需要配置防火墙以允许HTTP和HTTPS流量:
1、允许HTTP和HTTPS流量:
   sudo firewall-cmd --permanent --add-service=http
   sudo firewall-cmd --permanent --add-service=https
2、重新加载防火墙:
sudo firewall-cmd --reload
三、创建虚拟主机配置文件
虚拟主机允许你在同一台服务器上托管多个域名,以下是配置虚拟主机的步骤:
1、创建网站目录(为example.com创建目录):
   sudo mkdir -p /var/www/html/example.com/public_html
   sudo chown -R $USER:$USER /var/www/html/example.com/public_html
   sudo chmod -R 755 /var/www/html/example.com/public_html
2、创建测试页面:
echo "<html><body><h1>Hello, World!</h1></body></html>" > /var/www/html/example.com/public_html/index.html
3、创建虚拟主机配置文件:
sudo vi /etc/httpd/conf.d/example.com.conf
4、添加以下内容到配置文件中:
   <VirtualHost *:80>
       ServerAdmin webmaster@example.com
       DocumentRoot "/var/www/html/example.com/public_html"
       ServerName example.com
       ServerAlias www.example.com
       ErrorLog "/var/log/httpd/example.com-error_log"
       CustomLog "/var/log/httpd/example.com-access_log" combined
</VirtualHost>5、重启Apache服务:
sudo systemctl restart httpd
四、部署更多网站
重复上述步骤,可以在同一个服务器上部署更多的网站,只需为每个新网站创建新的目录和虚拟主机配置文件即可,为anotherdomain.com创建虚拟主机:
1、创建网站目录:
   sudo mkdir -p /var/www/html/anotherdomain.com/public_html
   sudo chown -R $USER:$USER /var/www/html/anotherdomain.com/public_html
   sudo chmod -R 755 /var/www/html/anotherdomain.com/public_html
2、创建测试页面:
echo "<html><body><h1>Welcome to Another Domain!</h1></body></html>" > /var/www/html/anotherdomain.com/public_html/index.html
3、创建虚拟主机配置文件:
sudo vi /etc/httpd/conf.d/anotherdomain.com.conf
4、添加以下内容到配置文件中:
   <VirtualHost *:80>
       ServerAdmin webmaster@anotherdomain.com
       DocumentRoot "/var/www/html/anotherdomain.com/public_html"
       ServerName anotherdomain.com
       ServerAlias www.anotherdomain.com
       ErrorLog "/var/log/httpd/anotherdomain.com-error_log"
       CustomLog "/var/log/httpd/anotherdomain.com-access_log" combined
</VirtualHost>5、重启Apache服务:
sudo systemctl restart httpd
五、常见问题解答(FAQs)
Q1:如何修改Apache默认端口?
A1:可以通过编辑Apache的主配置文件/etc/httpd/conf/httpd.conf来修改默认端口,找到Listen指令并将其值改为所需的端口号,例如8080:
Listen 8080
然后重启Apache服务:
sudo systemctl restart httpd
还需要确保防火墙允许新的端口通过:
sudo firewall-cmd --permanent --add-port=8080/tcp
sudo firewall-cmd --reload
Q2:如何启用SSL/TLS加密?
A2:要启用SSL/TLS加密,需要安装mod_ssl模块并生成自签名证书或从证书颁发机构获取证书,以下是详细步骤:
1、安装mod_ssl模块:
sudo yum install mod_ssl -y
2、生成自签名证书(用于测试):
   sudo openssl req -new -newkey rsa:2048 -nodes -keyout /etc/pki/tls/private/example.com.key -out /etc/pki/tls/certs/example.com.csr
   sudo openssl x509 -req -days 365 -in /etc/pki/tls/certs/example.com.csr -signkey /etc/pki/tls/private/example.com.key -out /etc/pki/tls/certs/example.com.crt
3、配置SSL虚拟主机:
sudo vi /etc/httpd/conf.d/ssl.conf
添加或修改以下内容:
   <VirtualHost *:443>
       ServerAdmin webmaster@example.com
       DocumentRoot "/var/www/html"
       ServerName example.com
       SSLEngine on
       SSLCertificateFile /etc/pki/tls/certs/example.com.crt
       SSLCertificateKeyFile /etc/pki/tls/private/example.com.key
       ErrorLog "/var/log/httpd/example.com-ssl-error_log"
       CustomLog "/var/log/httpd/example.com-ssl-access_log" combined
</VirtualHost>4、重启Apache服务:
sudo systemctl restart httpd
5、确保防火墙允许HTTPS流量:
   sudo firewall-cmd --permanent --add-service=https
   sudo firewall-cmd --reload
通过这些步骤,你可以在CentOS上成功安装并配置Apache以托管多个网站,同时启用SSL/TLS加密以确保数据传输的安全性。
本站发布或转载的文章及图片均来自网络,其原创性以及文中表达的观点和判断不代表本站,有问题联系侵删!
本文链接:http://www.xixizhuji.com/fuzhu/363115.html
