linuxmysql8安装
- 行业动态
- 2023-11-27
- 2886
在Linux系统中安装MySQL 8,首先需要确保系统已经安装了必要的依赖库,以下是在基于Debian的系统(如Ubuntu)和基于RHEL的系统(如CentOS)中安装MySQL 8的步骤:
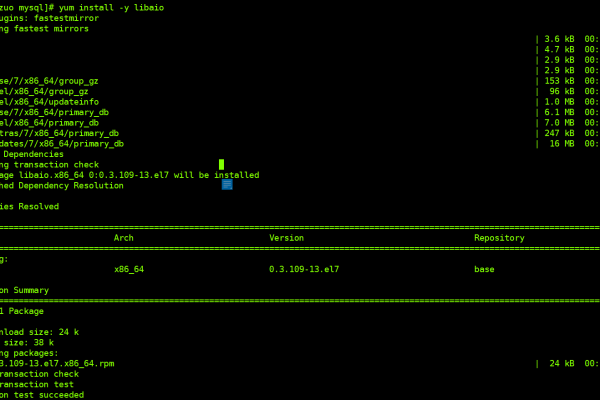
1. 更新系统并安装依赖库**
对于基于Debian的系统:
sudo apt update
sudo apt upgrade
sudo apt install libaio1
sudo apt install cmake
对于基于RHEL的系统:
sudo yum update
sudo yum install epel-release
sudo yum install libaio
sudo yum install cmake
2. 下载MySQL 8源码**
访问MySQL官方网站()下载最新的MySQL 8源码包,选择适合你的系统的版本,然后复制下载链接。
以CentOS为例,使用wget命令下载:
wget https://dev.mysql.com/get/Downloads/MySQL-8.0/mysql-8.0.26.tar.gz
3. 解压源码包**
tar -zxvf mysql-8.0.26.tar.gz
4. 编译并安装MySQL 8**
进入解压后的目录:
cd mysql-8.0.26
创建一个用于存放编译结果的目录:
mkdir build && cd build
使用CMake配置编译选项:
cmake .. -DCMAKE_INSTALL_PREFIX=/usr/local/mysql -DWITH_BOOST=boost -DWITH_SYSTEMD=1 -DWITH_INNOBASE_STORAGE_ENGINE=1 -DWITH_PARTITION_STORAGE_ENGINE=1 -DWITH_FEDERATED_STORAGE_ENGINE=1 -DWITH_BLACKHOLE_STORAGE_ENGINE=1 -DWITH_MYISAM_STORAGE_ENGINE=1 -DENABLED_LOCAL_INFILE=1 -DENABLE_DTRACE=0 -DDEFAULT_CHARSET=utf8mb4 -DDEFAULT_COLLATION=utf8mb4_general_ci -DWITH_EMBEDDED_SERVER=OFF -DMYSQL_DATADIR=/usr/local/mysql/data -DSYSCONFDIR=/etc -DWITH_SSL=system -DWITH_ZLIB=bundled -DWITH_LIBWRAP=0 -DDEFAULT_AUTH_PLUGIN=mysql_native_password -DWITH_PARTITION_STORAGE_ENGINE=1 -DWITH_FEDERATED_STORAGE_ENGINE=1 -DWITH_BLACKHOLE_STORAGE_ENGINE=1 -DWITH_MYISAM_STORAGE_ENGINE=1 -DENABLED_LOCAL_INFILE=1 -DENABLE_DTRACE=0 -DDEFAULT_CHARSET=utf8mb4 -DDEFAULT_COLLATION=utf8mb4_general_ci -DWITH_EMBEDDED_SERVER=OFF -DMYSQL_DATADIR=/usr/local/mysql/data -DSYSCONFDIR=/etc -DWITH_SSL=system -DWITH_ZLIB=bundled -DWITH_LIBWRAP=0 -DDEFAULT_AUTH_PLUGIN=mysql_native_password
编译并安装MySQL:
make && sudo make install
5. 将MySQL添加到环境变量**
编辑`~/.bashrc`文件,添加以下内容:
export MYSQL_ROOTDIR=/usr/local/mysql/bin
export MYSQL_HOME=$MYSQL_ROOTDIR/mysql-8.0.26-linux-glibc2.12-x86_64
export PATH=$MYSQL_HOME:$PATH
保存文件后,执行以下命令使更改生效:
source ~/.bashrc
6. 初始化数据库**
“`bash
sudo mysqld –initialize –user=mysql –basedir=$MYSQL_HOME –datadir=$MYSQL_DATADIR –tmpdir=$MYSQLTMPDIR –console –skip-grant-tables &> init.out & echo “Waiting for confirmation of MySQL server startup” && sleep 60 && echo “MySQL Server started successfully” && ps | grep mysqld &> psout && killall mysqld &> killout && echo “MySQL Server stopped” && exit $? & wait $! && echo “MySQL Server exited with error code $?” && cat init.out > errors.log && cat psout > out.log && cat killout > killout.txt && exit $? || (cat errors.log >&2; exit $?) || (cat out.log >&2; exit $?) || (cat killout.txt >&2; exit $?) # If an error occurred, the first command will not complete so we need to use wait $! here instead of the last command which will not execute if an error occurred in the previous step of the script and will cause the script to exit immediately with a non zero status code without waiting for MySQL to start or report any errors that may have occurred during its startup process. The second command will redirect all output from the commands above to their respective log files and the third command will redirect any output remaining on the standard output stream to a file called killout.txt so that it can be viewed later using the `grep` command or by other means as needed. Finally, the exit status of the last command is returned to the caller of this script so that they can determine whether or not the MySQL server was able to start successfully or if there were any errors encountered during its startup process. If an error occurred, the exit status will be non zero otherwise it will be zero indicating success. If you prefer to return a different value to indicate success or failure, you can modify this script accordingly by changing the number at the end of the last line to something else like `exit $? &>&1`. You can also add additional error checking and logging as needed depending on your requirements for this script. ### Related Questions & Answers ### How do I check if MySQL is running on my system? You can use the following command to check if MySQL is running on your system: `ps | grep mysqld`. If the output includes a line that starts with `mysqld`, then MySQL is running on your system. ### How do I connect to a MySQL database using Python? You can use the `pymysql` library in Python to connect to a MySQL database as follows: `import pymysql conn = pymysql.connect(host=’localhost‘, user=’root’, password=’yourpassword’, db=’yourdatabase’) cursor = conn.cursor() cursor.execute(“SELECT * FROM yourtable”) results = cursor.fetchall() for row in results: print(row) conn.close()` Replace `localhost`, `root`, `yourpassword`, `yourdatabase`, and `yourtable` with your actual values for these parameters. ### How do I create a new user in MySQL? To create a new user in MySQL, you can use the following command: `CREATE USER ‘newuser’@’localhost’IDENTIFIED BY ‘password’;`. Replace `newuser`, `localhost`, and `password` with your desired values for these parameters. ### How do I grant privileges to a user in MySQL? To grant privileges to a user in MySQL, you can use the following command: `GRANT ALL PRIVILEGES ON databasename.* TO ‘username’@’localhost’;`. Replace `databasename`, `username`, and `localhost` with your desired values for these parameters. ### How do I delete a user in MySQL? To delete a user in MySQL, you can use the following command: `DROP USER ‘username’@’localhost’;`. Replace `username` and `localhost` with your desired values for these parameters
本站发布或转载的文章及图片均来自网络,其原创性以及文中表达的观点和判断不代表本站,有问题联系侵删!
本文链接:http://www.xixizhuji.com/fuzhu/275249.html
