springboot使用Redis作缓存使用入门教程
- 行业动态
- 2024-02-20
- 1
SpringBoot整合Redis缓存入门教程,详解依赖配置、连接设置、缓存启用及管理,助您快速上手Redis缓存应用。
Spring Boot 整合 Redis 实现缓存功能入门教程
概述
在当今互联网时代,系统的性能和用户体验至关重要,缓存技术作为一种优化手段,能够有效提高系统的访问速度和并发处理能力,Redis 是一款高性能的键值对存储系统,被广泛应用于缓存、消息队列等领域,Spring Boot 是一款基于 Spring 框架的微服务开发框架,它简化了配置和部署过程,让开发者能够快速构建独立的、生产级别的应用程序,本文将介绍如何使用 Spring Boot 整合 Redis 实现缓存功能。
环境准备
1、安装 Redis
需要在系统中安装 Redis,可以从 Redis 官网下载相应版本的安装包,然后按照官方文档进行安装,安装完成后,启动 Redis 服务。
2、创建 Spring Boot 项目
使用 Spring Initializr(https://start.spring.io/)创建一个 Spring Boot 项目,选择相应的依赖:
– Spring Web
– Spring Data Redis
– Jedis
下载项目后,解压并导入到开发工具(如 IntelliJ IDEA、Eclipse 等)。
配置 Redis
在 Spring Boot 项目中,需要在 application.properties 或 application.yml 文件中配置 Redis 相关属性。
1、application.properties
Redis 数据库索引(默认为 0)
spring.redis.database=0
Redis 服务器地址
spring.redis.host=localhost
Redis 服务器连接端口
spring.redis.port=6379
Redis 服务器连接密码(默认为空)
spring.redis.password=
连接池最大连接数(使用负值表示没有限制)
spring.redis.jedis.pool.max-active=8
连接池最大阻塞等待时间(使用负值表示没有限制)
spring.redis.jedis.pool.max-wait=-1
连接池中的最大空闲连接
spring.redis.jedis.pool.max-idle=8
连接池中的最小空闲连接
spring.redis.jedis.pool.min-idle=0
连接超时时间(毫秒)
spring.redis.timeout=5000
2、application.yml
spring:
  redis:
    database: 0
    host: localhost
    port: 6379
    password:
    jedis:
      pool:
        max-active: 8
        max-wait: -1
        max-idle: 8
        min-idle: 0
    timeout: 5000
使用 RedisTemplate
Spring Boot 提供了 RedisTemplate 和 StringRedisTemplate 两个模板类,用于简化 Redis 操作,RedisTemplate 是泛型模板,可以操作任意的 Java 对象;StringRedisTemplate 是 RedisTemplate 的子类,专门用于操作字符串。
1、注入 RedisTemplate
在 Spring Boot 主配置类中注入 RedisTemplate:
import org.springframework.context.annotation.Bean;
import org.springframework.context.annotation.Configuration;
import org.springframework.data.redis.connection.RedisConnectionFactory;
import org.springframework.data.redis.core.RedisTemplate;
@Configuration
public class RedisConfig {
    @Bean
    public RedisTemplate<String, Object> redisTemplate(RedisConnectionFactory factory) {
        RedisTemplate<String, Object> template = new RedisTemplate<>();
        template.setConnectionFactory(factory);
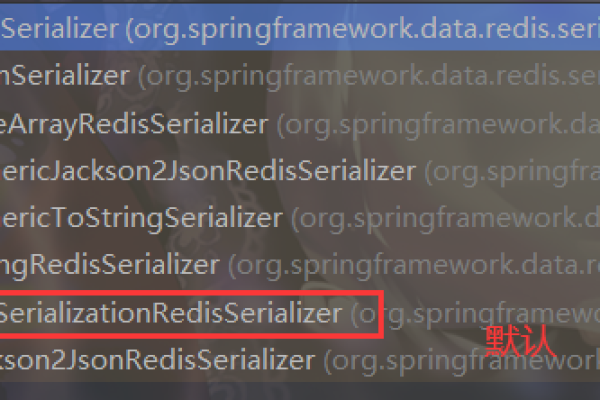
        // 使用 Jackson2JsonRedisSerializer 来序列化和反序列化 redis 的 value 值(默认使用 JdkSerializationRedisSerializer)
        Jackson2JsonRedisSerializer jacksonSeial = new Jackson2JsonRedisSerializer(Object.class);
        ObjectMapper om = new ObjectMapper();
        //指定要序列化的域,field,get和set,以及修饰范围,ANY是都有包括private和public
        om.setVisibility(PropertyAccessor.ALL, JsonAutoDetect.Visibility.ANY);
        //指定序列化输入的类型,类必须是非final修饰的
        om.enableDefaultTyping(ObjectMapper.DefaultTyping.NON_FINAL);
        jacksonSeial.setObjectMapper(om);
        // 值采用json序列化
        template.setValueSerializer(jacksonSeial);
        //使用StringRedisSerializer来序列化和反序列化redis的key值
        template.setKeySerializer(new StringRedisSerializer());
        // 设置hash key 和value序列化模式
        template.setHashKeySerializer(new StringRedisSerializer());
        template.setHashValueSerializer(jacksonSeial);
        template.afterPropertiesSet();
        return template;
    }
}
2、使用 RedisTemplate
在业务类中,注入 RedisTemplate,并使用它进行缓存操作:
import org.springframework.beans.factory.annotation.Autowired;
import org.springframework.data.redis.core.RedisTemplate;
import org.springframework.stereotype.Service;
@Service
public class CacheService {
    @Autowired
    private RedisTemplate<String, Object> redisTemplate;
    public void setCache(String key, Object value) {
        redisTemplate.opsForValue().set(key, value);
    }
    public Object getCache(String key) {
        return redisTemplate.opsForValue().get(key);
    }
}
使用缓存注解
Spring Boot 提供了 @Cacheable、@CachePut 和 @CacheEvict 等注解,简化缓存操作。
1、@Cacheable
@Cacheable 注解用于将方法的返回值缓存到 Redis。
import org.springframework.cache.annotation.Cacheable;
import org.springframework.stereotype.Service;
@Service
public class UserService {
    @Cacheable(value = "user", key = "#id")
    public User findById(Long id) {
        // 模拟数据库查询操作
        return new User(id, "张三");
    }
}
2、@CachePut
@CachePut 注解用于更新 Redis 中的缓存。
import org.springframework.cache.annotation.CachePut;
import org.springframework.stereotype.Service;
@Service
public class UserService {
    @CachePut(value = "user", key = "#user.id")
    public User updateUser(User user) {
        // 模拟数据库更新操作
        return user;
    }
}
3、@CacheEvict
@CacheEvict 注解用于删除 Redis 中的缓存。
import org.springframework.cache.annotation.CacheEvict;
import org.springframework.stereotype.Service;
@Service
public class UserService {
    @CacheEvict(value = "user", key = "#id")
    public void deleteUser(Long id) {
        // 模拟数据库删除操作
    }
}
本文介绍了如何使用 Spring Boot 整合 Redis 实现缓存功能,配置了 Redis 相关属性;通过 RedisTemplate 和缓存注解简化了 Redis 操作,通过本文的学习,读者可以快速上手 Spring Boot 与 Redis 的集成开发,提高系统的性能和并发处理能力。
本站发布或转载的文章及图片均来自网络,其原创性以及文中表达的观点和判断不代表本站,有问题联系侵删!
本文链接:http://www.xixizhuji.com/fuzhu/215203.html

