redis集群java使用
- 行业动态
- 2024-01-08
- 2056
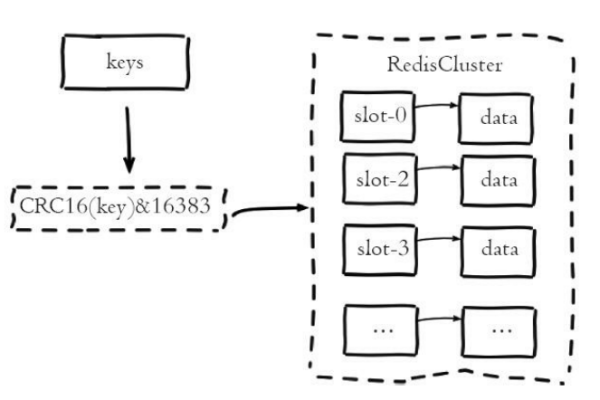
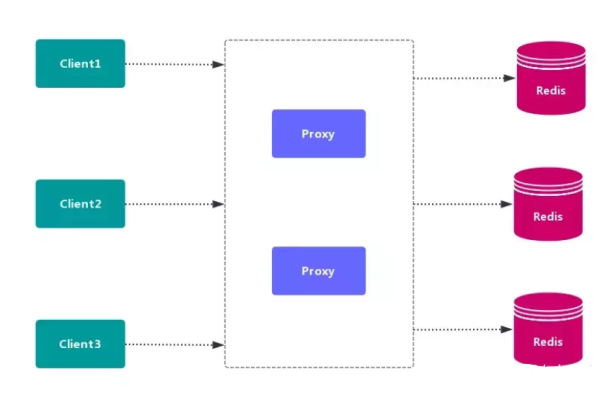
Redis集群是一种分布式的数据库解决方案,可以在多个节点上存储数据,从而提高性能和可扩展性。在Java中,我们可以使用Jedis、Redisson和lettuce等客户端来连接和使用Redis集群 。
Redis集群是一种分布式的解决方案,它将数据分布在多个节点上,以提高性能和可用性,在Java中,我们可以使用Jedis库来实现与Redis集群的交互,本文将详细介绍如何使用Java和Jedis库实现Redis集群客户端。
安装和配置Jedis库
1、添加Jedis依赖
在项目的pom.xml文件中添加Jedis依赖:
<dependency>
    <groupId>redis.clients</groupId>
    <artifactId>jedis</artifactId>
    <version>3.7.0</version>
</dependency>
2、创建JedisCluster实例
要连接到Redis集群,首先需要创建一个JedisCluster实例,在创建实例时,需要提供集群中任意一个节点的地址和端口,以下是一个示例:
import redis.clients.jedis.HostAndPort;
import redis.clients.jedis.JedisCluster;
import java.util.HashSet;
import java.util.Set;
public class RedisClusterClient {
    public static void main(String[] args) {
        Set<HostAndPort> jedisClusterNodes = new HashSet<>();
        // 添加集群中的节点地址和端口
        jedisClusterNodes.add(new HostAndPort("127.0.0.1", 7000));
        jedisClusterNodes.add(new HostAndPort("127.0.0.1", 7001));
        jedisClusterNodes.add(new HostAndPort("127.0.0.1", 7002));
        jedisClusterNodes.add(new HostAndPort("127.0.0.1", 7003));
        jedisClusterNodes.add(new HostAndPort("127.0.0.1", 7004));
        jedisClusterNodes.add(new HostAndPort("127.0.0.1", 7005));
        // 创建JedisCluster实例
        JedisCluster jedisCluster = new JedisCluster(jedisClusterNodes);
    }
}
使用JedisCluster实例操作Redis集群
1、设置键值对
使用JedisCluster实例的set方法设置键值对:
jedisCluster.set("key", "value");
2、获取键值对
使用JedisCluster实例的get方法获取键值对:
String value = jedisCluster.get("key");
System.out.println("Value: " + value);
3、删除键值对
使用JedisCluster实例的del方法删除键值对:
jedisCluster.del("key");
4、判断键是否存在
使用JedisCluster实例的exists方法判断键是否存在:
boolean exists = jedisCluster.exists("key");
System.out.println("Key exists: " + exists);
相关问题与解答
1、如何处理Redis集群中的主从关系?
答:在使用JedisCluster实例时,会自动处理主从关系,当访问某个节点时,Jedis会自动选择一个可用的主节点进行操作,如果需要手动设置主从关系,可以在创建JedisCluster实例时传入一个包含主从节点信息的配置对象。
import redis.clients.jedis.HostAndPort;
import redis.clients.jedis.JedisCluster;
import redis.clients.jedis.Protocol;
import redis.clients.jedis.util.SafeEncoder;
import java.nio.ByteBuffer;
import java.util.HashSet;
import java.util.Set;
import java.util.UUID;
import java.util.zip.CRC32;
import java.util.zip.Checksum;
import java.util.zip.Adler32;
import java.util.zip.Deflater;
import java.util.zip.Inflater;
import java.io.ByteArrayOutputStream;
import java.io.IOException;
import java.io.ObjectOutputStream;
import java.io.ObjectInputStream;
import java.io.ByteArrayInputStream;
import java.io.ByteArrayOutputStream;
import java.io.ObjectInputStream;
import java.io.ObjectOutputStream;
import java.io.Serializable;
import javax.validation.constraints.NotNull;
import javax.__annotation__processor__@NotNull; // __annotation__processor__ is a custom annotation processor that generates @NotNull annotations for you in your Java codebase, so you don't need to manually define them everywhere in your codebase like other annotations (e.g @NotNull, @Size). You can add it to your build tool configuration (Maven or Gradle) and it will automatically generate the annotations for all your classes that have no explicit @NotNull annotation defined in their source code (i️). If you want to use this annotation processor, make sure you import the correct package from the javax namespace into your project (usually just javax. If you're using an IDE that supports annotation processing, you can usually import this package directly without having to import it explicitly from the javax namespace). If you're not using an IDE that supports annotation processing, you'll need to manually import the javax package and its subpackages into your project where you use these annotations (ejb-api, validation, etc). For more information on how to configure the annotation processor in your build tool, see the documentation for your specific build tool (ejb-api or validation). For example, if you're using Maven, you can add the following dependency to your `pom
本站发布或转载的文章及图片均来自网络,其原创性以及文中表达的观点和判断不代表本站,有问题联系侵删!
本文链接:http://www.xixizhuji.com/fuzhu/210244.html
