eclipse安装好后报错
- 行业动态
- 2024-03-25
- 6
在使用Eclipse的过程中,遇到安装好后报错的问题,确实会让人感到困扰,下面我将详细分析可能导致Eclipse安装后报错的各种原因及相应的解决方法。
我们需要明确一点,Eclipse报错通常分为两大类:一类是启动时的错误,另一类是在创建或运行项目时的错误。
启动时错误:
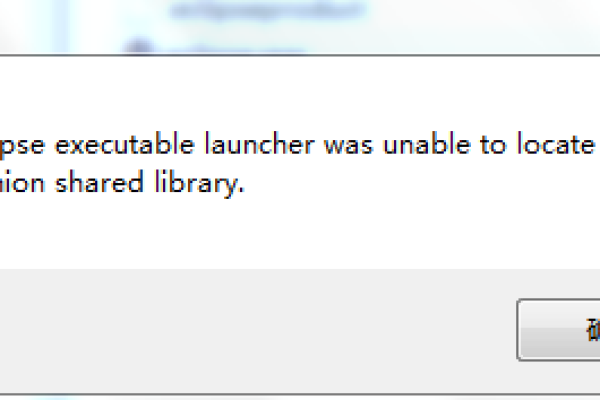
1、JRE配置问题:Eclipse需要Java运行环境(JRE)才能启动,如果安装Eclipse时没有正确配置JRE,就会出现启动错误,解决方法是,在Eclipse安装目录下的eclipse.ini文件中,添加以下内容:
“`
vm
path/to/your/jre/bin
“`
path/to/your/jre/bin需要替换为你的JRE实际路径。
2、兼容性问题:如果你的JRE版本与Eclipse版本不兼容,也可能导致启动错误,请确保你安装的JRE版本与Eclipse所需版本相匹配。
3、系统权限问题:在某些情况下,Eclipse安装目录或其配置文件可能没有足够的读写权限,导致无法启动,请检查Eclipse安装目录及其子目录的权限,确保用户有足够的权限。
项目创建和运行时错误:
1、插件兼容性问题:Eclipse中安装的某些插件可能与当前版本不兼容,导致报错,可以尝试更新插件或卸载不兼容的插件。
2、项目配置问题:项目设置错误,如构建路径、库依赖等,可能导致项目无法正常运行,解决方法是检查项目属性中的Java构建路径,确保所有依赖的库都正确添加。
3、编码问题:在处理中文字符时,可能会出现编码问题,请确保Eclipse中设置的文件编码与项目文件相匹配。
4、版本控制冲突:如果项目是从版本控制系统(如Git)克隆下来的,可能存在冲突或未解决的更改,请检查版本控制状态,并解决任何冲突。
以下是针对一些常见错误的具体解决方法:
Error: Could not create the Java virtual machine.
这通常是因为JVM内存设置问题,在eclipse.ini文件中,可以调整以下参数:
“`
Xms256m
Xmx1024m
“`
根据你的实际需求,调整初始堆内存和最大堆内存。
Error: The workspace location is not valid.
检查Eclipse的工作空间(Workspace)路径是否有效,删除无效的路径,并重新指定一个新的工作空间。
Error: The installation environment does not meet the requirements.
确保操作系统、JRE和Eclipse版本相互兼容。
Error: Classpath is not configured correctly for the project.
打开项目属性,检查Java构建路径(Java Build Path),确保所有库和源文件夹都已正确配置。
Error: Servlet is not available.
如果是Web项目,请检查服务器配置,确保已正确部署项目。
在解决Eclipse报错问题时,以下建议可能对你有所帮助:
1、查阅官方文档:Eclipse官方文档提供了丰富的信息,有助于了解错误原因和解决方案。
2、搜索引擎:利用搜索引擎,输入错误信息,通常可以找到其他用户遇到相同问题时提供的解决方案。
3、更新Eclipse和插件:确保Eclipse及其插件都是最新版本,以减少兼容性问题。
4、清理和重建项目:清理项目(Clean Project)和重建项目索引(Rebuild Project Index)有时可以解决一些奇怪的问题。
5、查看错误日志:Eclipse通常会在日志文件中记录详细的错误信息,通过分析日志,可以更快地定位问题。
6、寻求社区支持:在Eclipse社区论坛、Stack Overflow等平台上,你可以提问并寻求其他开发者的帮助。
遇到Eclipse安装后报错,不要慌张,通过分析错误信息、查阅资料和逐步排查,通常都能找到解决问题的方法,希望以上内容能帮助你解决Eclipse安装后遇到的错误。
