上一篇
如何在Android上实现一个简易的记事本应用?
- 行业动态
- 2024-11-10
- 1
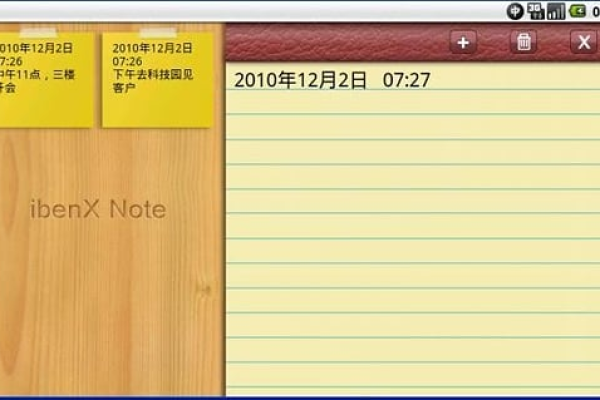
Android 实现简易记事本,可以使用 EditText 输入文字,Button 保存到本地文件。
在Android平台上实现一个简易记事本应用,可以帮助用户记录日常的笔记和待办事项,以下是一个简单的实现指南:

项目设置
创建一个新的Android Studio项目,选择“Empty Activity”模板。
设计布局
在res/layout/activity_main.xml中定义UI布局,使用一个EditText用于输入文本,一个Button用于保存笔记,以及一个RecyclerView用于显示笔记列表。
<LinearLayout
    xmlns:android="http://schemas.android.com/apk/res/android"
    android:layout_width="match_parent"
    android:layout_height="match_parent"
    android:orientation="vertical">
    <EditText
        android:id="@+id/editTextNote"
        android:layout_width="match_parent"
        android:layout_height="wrap_content"
        android:hint="Enter your note here"/>
    <Button
        android:id="@+id/buttonSave"
        android:layout_width="wrap_content"
        android:layout_height="wrap_content"
        android:text="Save"/>
    <androidx.recyclerview.widget.RecyclerView
        android:id="@+id/recyclerViewNotes"
        android:layout_width="match_parent"
        android:layout_height="wrap_content"/>
</LinearLayout>
创建数据模型
创建一个Note类来表示单个笔记。
public class Note {
    private String content;
    public Note(String content) {
        this.content = content;
    }
    public String getContent() {
        return content;
    }
}
创建适配器
创建一个NoteAdapter类来绑定笔记数据到RecyclerView。
public class NoteAdapter extends RecyclerView.Adapter<NoteAdapter.NoteHolder> {
    private List<Note> notes;
    public NoteAdapter(List<Note> notes) {
        this.notes = notes;
    }
    @NonNull
    @Override
    public NoteHolder onCreateViewHolder(@NonNull ViewGroup parent, int viewType) {
        View view = LayoutInflater.from(parent.getContext()).inflate(R.layout.item_note, parent, false);
        return new NoteHolder(view);
    }
    @Override
    public void onBindViewHolder(@NonNull NoteHolder holder, int position) {
        Note note = notes.get(position);
        holder.textView.setText(note.getContent());
    }
    @Override
    public int getItemCount() {
        return notes.size();
    }
    static class NoteHolder extends RecyclerView.ViewHolder {
        TextView textView;
        public NoteHolder(@NonNull View itemView) {
            super(itemView);
            textView = itemView.findViewById(R.id.textViewNote);
        }
    }
}
更新布局文件以包括适配器项视图
在res/layout/item_note.xml中创建单项笔记的布局。
<TextView xmlns:android="http://schemas.android.com/apk/res/android"
    android:id="@+id/textViewNote"
    android:layout_width="match_parent"
    android:layout_height="wrap_content" />
编写主活动逻辑
在MainActivity中处理笔记的添加和显示。
public class MainActivity extends AppCompatActivity {
    private EditText editTextNote;
    private Button buttonSave;
    private RecyclerView recyclerViewNotes;
    private List<Note> notes;
    private NoteAdapter adapter;
    @Override
    protected void onCreate(Bundle savedInstanceState) {
        super.onCreate(savedInstanceState);
        setContentView(R.layout.activity_main);
        editTextNote = findViewById(R.id.editTextNote);
        buttonSave = findViewById(R.id.buttonSave);
        recyclerViewNotes = findViewById(R.id.recyclerViewNotes);
        recyclerViewNotes.setLayoutManager(new LinearLayoutManager(this));
        notes = new ArrayList<>();
        adapter = new NoteAdapter(notes);
        recyclerViewNotes.setAdapter(adapter);
        buttonSave.setOnClickListener(v -> {
            String content = editTextNote.getText().toString();
            if (!content.isEmpty()) {
                notes.add(new Note(content));
                adapter.notifyItemInserted(notes.size() 1);
                editTextNote.setText("");
            }
        });
    }
}
运行应用程序
您可以运行应用程序并在设备或模拟器上看到记事本的功能,用户可以输入文本,点击保存按钮,然后看到笔记被添加到列表中。
小伙伴们,上文介绍了“Android实现简易记事本”的内容,你了解清楚吗?希望对你有所帮助,任何问题可以给我留言,让我们下期再见吧。
本站发布或转载的文章及图片均来自网络,其原创性以及文中表达的观点和判断不代表本站,有问题联系侵删!
本文链接:http://www.xixizhuji.com/fuzhu/17356.html

